|
How To Use AIM (AOL Instant Messenger)
Listed below are the 4 basic steps to understanding
AIM.
- Installing AIM
- Registering a Screen Name
- Setting up your Buddy List
- Using AIM
1) Installing AIM
Begin by clicking here.
A new window should pop up that looks like this:
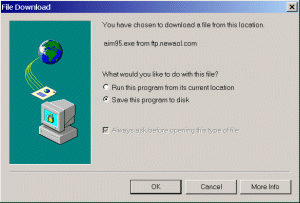
Click "OK" to continue. You will be prompted to save
the file aim95.exe to a folder on your computer. Click the
pull-down menu at the top beside the words "Save in." Click the
option that says "Desktop." (It should be near the top of the list.)
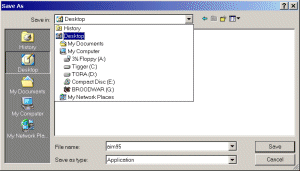
Click "Save" to save the file to your computer. The
file will begin downloading. When the download is complete, the
window will look like this:
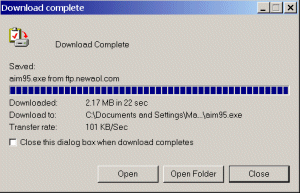
Click the "Open" button. AIM will begin its installation
process. Just follow the prompts from this point to complete the
installation. If you are unsure of what to select from any of the
options that the installer presents you, it usually best just to
choose whatever the installer has selected by default.
2) Registering a Screen Name
When the installation is complete, press "Ok"
to begin running AOL. You will prompted to either "Register
a new screen name" or "Use AOL screen name." If you
already have an AOL account or AIM screen name, click "Use
AOL screen name" and go to Step
3: Setting Up AIM. If, however, you do not have an AOL or AIM
screen name, or you wish to create a new screen name, click "Register
new screen name." A Web browser window will open to this
page. Proceed with the online registration in your browser window.
After you have registered your new screen name, the page heading
will say something like "Congratulations! You are Registered
for AOL Instant Messenger!" In your email you will find a message
from "AOL Instant Messenger." Open this message and click
the "Reply" button. Delete the entire message body in
your reply window. Type "OK" as the body of your message.
Click "Send." This confirms your registration for AIM.
3) Setting Up Your Buddy List
At the following window, you will need to type in
your registered AIM Screen Name and password:
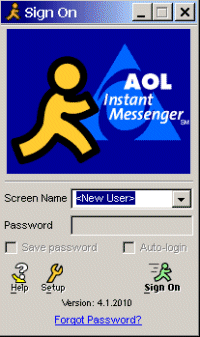
After entering your screen name and password, click
the "Sign On" button to connect to the AIM network. When
the connection is made, your Buddy List will appear. The following
window will also appear:
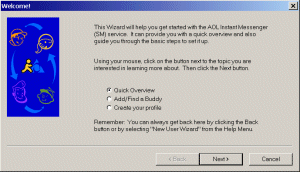
Click the radio button beside "Add/Find a Buddy."
Then click "Next." You will then be prompted to enter
a buddy's Screen Name. If you know your buddy's Screen Name, enter
it now and click "Next."
If you do not know anyone's Screen Name, just leave the field blank,
and click "Next." You will then be presented with search
options through which you can find a new Buddy. Follow the prompts
to find and add a new Buddy to your Buddy List. By whatever means
you added a Buddy, either by typing in someone's Screen Name or
by searching for one, you will now be presented with the option
of selecting a group for your Buddy. Select the appropriate group
from the drop-down menu and click "OK." Click "Finish"
on the next window to complete this entry. Your Buddy has now been
added to your Buddy List.
4) Using AIM
If one of your Buddies is online, you can send them
a message by double-clicking their Screen Name in your Buddy List.
A new window will pop up. Type your message and click "Send."
You are now in a chat window with your Buddy. Messages from your
buddy will appear in this window as you chat. When you are done
chatting, simply close the window.
|